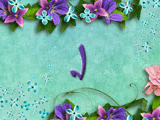
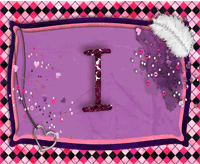
Are you feeling in a party mood this morning? It's hard to feel much like a party when all the Christmas and New Year celebrations are over and it's gloomy and cold outside, so I thought I'd show you something bright and cheery to help the day along a little.
These cards were produced for the Stamping with Clarity show on Create and Craft TV last Sunday. When the stamps arrived, I was delighted with them and I think they hold many possibilities.

This is another of my not very good photographs but I hope you can see the effect. It gave me a good opportunity to play with my Twinkling H2Os to create the background. They haven't been out to play since I can't remember when and I've promised myself that I won't leave it so long before I bring them out again! To get this effect, I first painted a sheet of A4 card with pale pink and then stamped all over it in random fashion with the small mask and the harlequin stamps using Versamark. I then applied clear embossing powder and heated it. Then out came a large-ish flat paint brush and I splodged several colours all over the top (red, pink, green, yellow, blue, purple). At this stage, it wasn't looking so clever but then I spayed it with Pearl Glimmer Mist and the magic happened when all the colours ran and blended into one another so I finally had the effect I'd been aiming for. Don't you just love it when a plan comes together?! With all this colour going on I decided to keep the large mask image to just black and white and it's stamped on to Centura Pearl Card, coloured with a black ProMarker then cut out and glued on to the background.
I wanted to create the impression of fireworks, which is how the gold ribbon came on to the scene. Having found the ribbon, the problem then was how to make it curl. The answer was to wind it round a wooden chop stick, secure the ends with little metal bulldog clips and apply the heat gun. However, I have a tip for you with this technique - wait for the bulldog clips to cool before removing them otherwise you're stuck holding an ice cube for some time until your fingers stop throbbing, ask me how I know!!
I then used the large mask stamp with one of the Clarity Alium stamps to produce the firework effect for this card:

The alium image was embossed with several different shades of Moonglow Embossing Powder. The main image has been stamped and enbossed in gold and then painted with the H2Os.
When it came to creating a card with the Dippy Toe Lady set, I knew I wanted to have the effect of the lady in a leafy glade at sunset then, having created the sunset, I was trying out all the colours of card to mount the image when I suddenly realised that I'd used all the colours of the Mardigras background -I am slow sometimes! Good thing that I'd created a whole A4 sheet wasn't it? Here's the result:

Hugs


These are absolutely stunning Diane!!
ReplyDeleteHugs Kristel
The background on your Mardi Gras cards are beautiful Diane, so colourful and just right for the theme. I was only thinking the other day about my H2Os - nearly put them in the bin as it's so long since I used them. Thank goodness I decided not too as I'm going to have a go myself.
ReplyDeleteLovely work as always Diane. I also have H2Os that haven't been out for a long time.
ReplyDeleteDiane these are delightful
ReplyDeletehugs